How to Use a Moka Pot on an Induction Cooktop (Without Bitter Coffee)
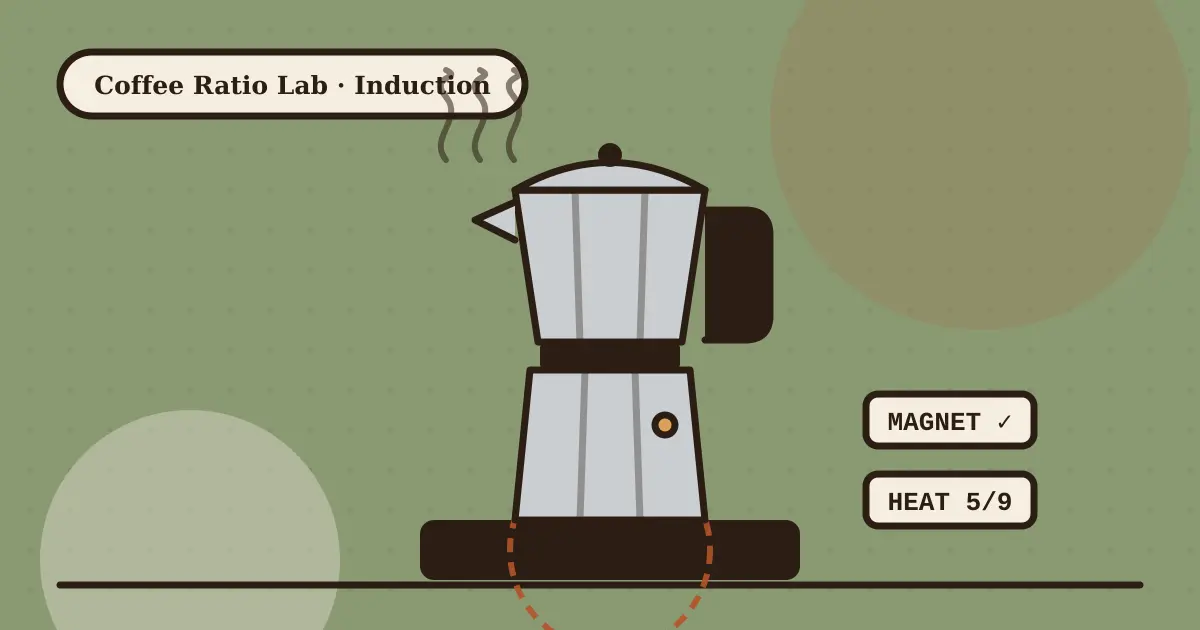
A moka pot only works on induction if its base is magnetic (stainless steel or a bonded steel plate). Plain aluminum pots need an induction adapter plate. Start with preheated water, use a medium setting (about 5–6 of 9), and take the pot off as soon as it gurgles.
Induction cooktops are fast, efficient and easy to clean, but they are fussy about cookware. Many people buy a classic moka pot, put it on an induction zone and find that nothing happens. Others get it working and then end up with harsh, burnt-tasting coffee because induction delivers heat far quicker than gas. This guide explains why that happens and walks you through a reliable routine.
Why most moka pots don't work on induction
An induction cooktop doesn't get hot by itself. It creates a magnetic field that heats the base of the pan directly, which only works when the base is made from a ferromagnetic metal such as cast iron or magnetic stainless steel.
The traditional moka pot is cast aluminum. Aluminum is not magnetic, so the stove simply doesn't detect it. A quick home test: hold a fridge magnet against the bottom of your pot. If it sticks firmly, the pot will work on induction. If it slides off, it won't.
You have three options:
- Buy an induction-ready moka pot. These are either fully stainless steel or aluminum with a bonded magnetic steel plate on the base.
- Use an induction adapter plate (heat diffuser disk). This is a flat magnetic disk that sits on the stove, heats up, and passes the heat to any pot placed on top.
- Use a different heat source such as a small electric hotplate or camping stove.
Adapter plate vs induction-ready pot
An adapter plate is the cheapest route if you already love your aluminum pot, but it has trade-offs. The disk heats first and then heats the pot, so the brew is slower and you lose some of the energy efficiency induction is known for. The plate also stays very hot for several minutes after you switch off, so keep it away from children and never place it on a worktop.
An induction-ready pot heats more directly and responds faster when you turn the power down. If you make moka coffee every day, it is usually the better long-term choice.
Step-by-step: brewing on an induction cooktop
1. Preheat your water
Fill a kettle and bring water to just off the boil. Starting with hot water means the pot spends less time on the stove, so the coffee in the basket doesn't "cook" while the water slowly heats up. This single change removes a lot of metallic, bitter flavor.
2. Fill the boiler to just below the valve
Pour the hot water into the bottom chamber until it sits just under the safety valve. Never cover the valve — it is there to release pressure if something blocks.
3. Fill the basket level, don't tamp
Use a grind slightly finer than for filter coffee but coarser than espresso — think table salt. Fill the basket to the top, level it with a finger and wipe any grounds off the rim. Do not press the coffee down; a packed basket can restrict flow and push too much pressure through the pot.
4. Assemble carefully
The boiler will be hot, so hold it with a folded dish towel while you screw on the top chamber. Tighten firmly but not with excessive force, which wears the gasket.
5. Use a medium-low power level
This is where induction differs most. On a 1–9 scale, start around 5 or 6, not on boost. With an adapter plate you may need a slightly higher setting because of the extra layer. Leave the lid open so you can see the coffee rise.
6. Watch for the honey-colored stream
Coffee should appear slowly, like warm honey. If it spurts or sprays, the heat is too high — drop a level or two. Once the stream turns pale and starts to gurgle and hiss, lift the pot off the stove immediately.
7. Stop the brew
Run the base under cold water for a few seconds, or wrap it in a cold, damp cloth. This drops the pressure in the boiler and stops the last, most bitter part of the extraction from reaching your cup.
Troubleshooting chart
| What you notice | Likely cause | What to change |
|---|---|---|
| Stove shows an error or "no pan" symbol | Base is not magnetic | Use an adapter plate or induction-ready pot |
| Coffee spurts and splashes | Heat too high | Lower the power level by 1–2 |
| Coffee takes over 8 minutes | Heat too low or cold water used | Start with hot water, raise power slightly |
| Burnt, ashy taste | Brew ran to the end on the stove | Remove earlier and cool the base |
| Thin, sour taste | Grind too coarse | Grind a little finer |
| Water leaks at the joint | Worn gasket or grounds on the rim | Clean the rim, replace the gasket |
Caring for your pot
Rinse every part with warm water after use and let it dry fully apart. Avoid the dishwasher for aluminum pots: detergents dull and pit the metal. Stainless steel models are tougher, but hand-washing still extends the life of the gasket and filter plate. Replace the rubber gasket whenever it hardens, cracks or the pot starts leaking at the thread.
Frequently asked questions
Can I put an aluminum moka pot directly on induction?
No. Aluminum isn't magnetic, so the stove won't heat it. You need an induction adapter plate or a moka pot with a magnetic steel base.
Is a heat diffuser plate safe for induction cooktops?
Plates designed for induction are generally safe when used as instructed. Use a plate at least as wide as your pot's base, keep the power moderate, and let it cool on the stove rather than moving it while hot.
What power level should I use for a moka pot on induction?
Start at a medium setting (around 5–6 out of 9) and adjust so the coffee flows in a steady, slow stream rather than spurting.
Why does my moka pot coffee taste burnt on induction?
Usually because the heat is too high or the pot stayed on the stove after the gurgling started. Use preheated water, a medium setting, and cool the base as soon as the stream turns pale.
Liked this guide? Get the next one free
Subscribe and get our free printable Brew Cheat Sheet — every ratio, grind and temperature on one page. Then one practical brewing tip a week. No spam, unsubscribe anytime.

We write step-by-step guides for everyday home brewers: moka pots, French presses, AeroPress, pour over and cold brew. Every guide is checked against manufacturer instructions and widely accepted brewing guidance, and updated when we learn something better. How we write our guides.